I 3D Printed a Replacement Part For My Toto C200 Washlet Baseplate

We recently moved (I guess it’s been like half a year now) to a house that only had “round” (short) toilets, so I lost the use of my butt-cleaning Toto C200 Washlet. I’ve been super busy with home projects and I only just got to the point where I could rectify (pun intended) this situation.
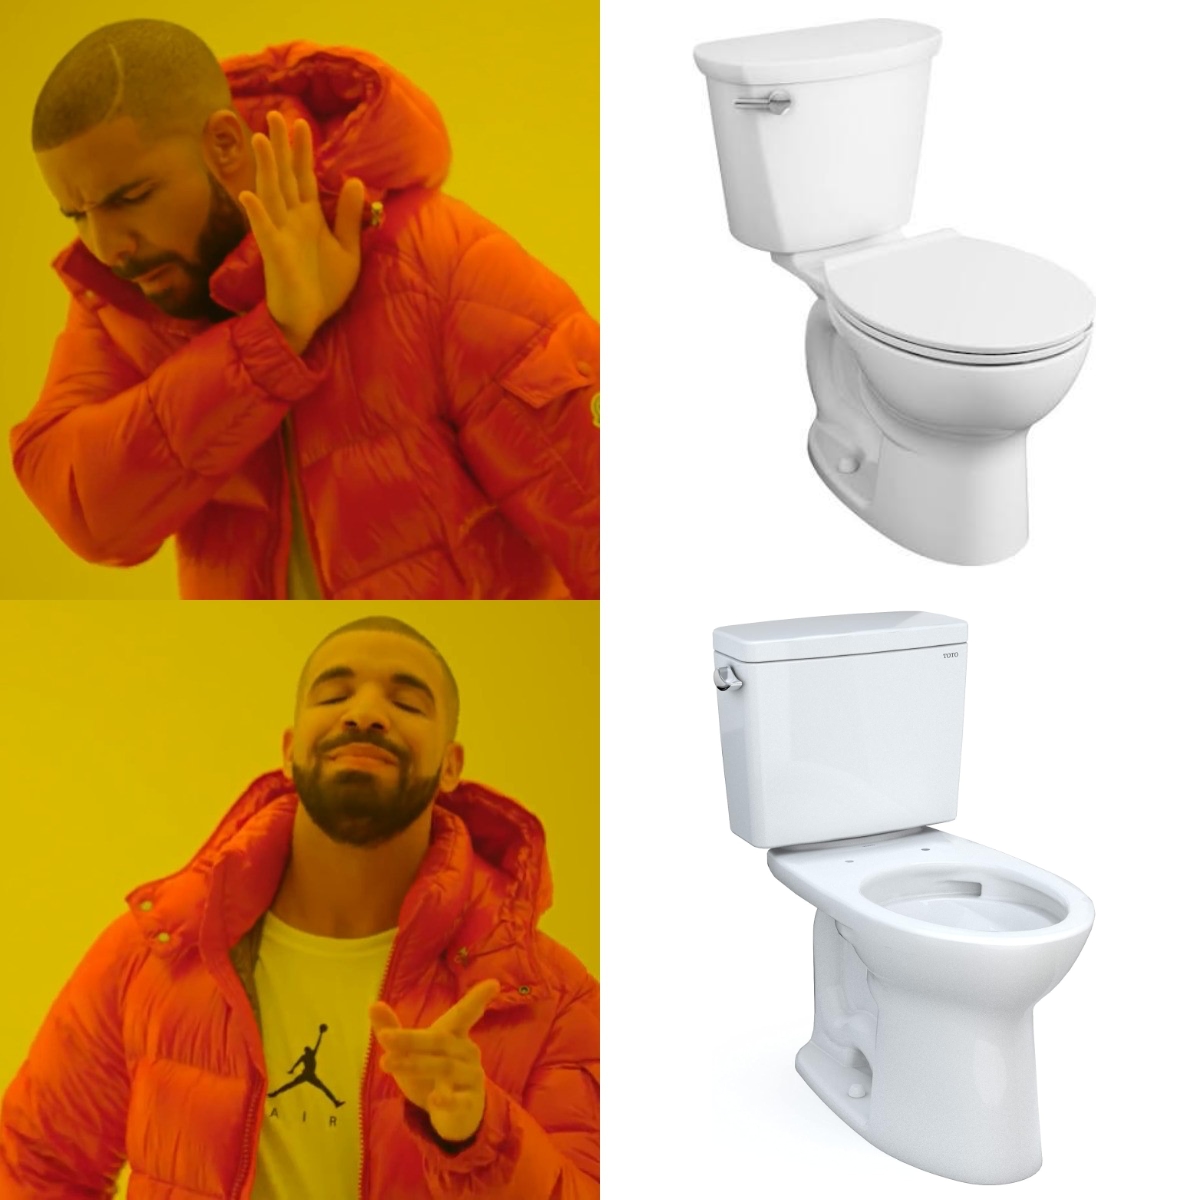
I probably could’ve just attached a way too big bidet toilet seat to a way too small toilet, but whatever. I ended up buying a Toto Drake (meme incoming) toilet because everyone says it’s like the best toilet ever. I never really thought about comparison shopping toilets (or even shopping for a toilet) before, but I figured I might as well get the best one.
Installing The Toilet
I guess this doesn’t really need to be in this post but I might as well include it for the sake of completeness. I watched a bunch of YouTube videos on replacing toilets, since that’s how you learn anything these days. Once I watched about 5 videos and poisoned the YouTube algorithm for my account permanently (now YouTube thinks I’m a toilet guy), I was confident enough to DIY it. I’ve also been working out so I figured a heavy toilet was nothing to my huge muscles.
The toilet install went fine, and I only needed to go to the hardware store twice (once for some PTFE tape to stop a small leak and another time to get a larger adjustable wrench to remove the thing that was leaking so I could apply the tape).
I felt pretty good about my powers of DIY and for my next project I’ll probably try to build a new house in my backyard or something. Actually, maybe I’ll start smaller than that.
Installing The Seat
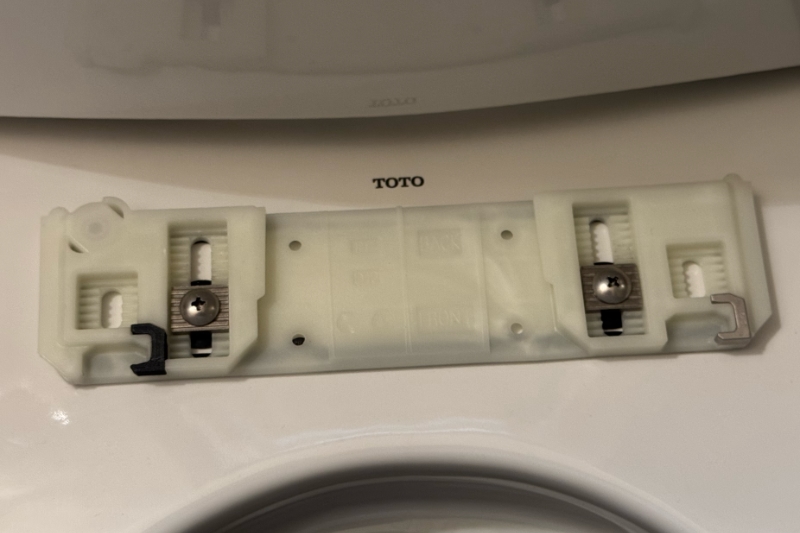
Once the toilet worked and didn’t leak, it was finally time for me to install the bidet seat that I had been missing for months. I pulled it out of a random box I had in my office and tried installing it, but when I tried to push the seat onto the toilet baseplate, it wouldn’t stick. It would just slide back out the front.
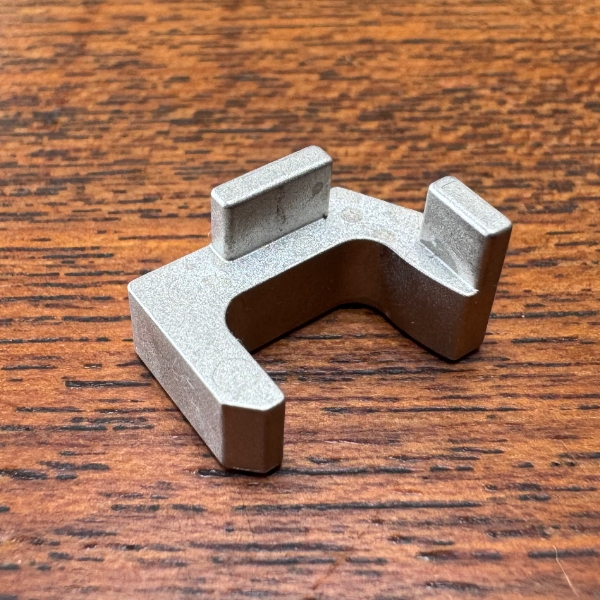
Now, I did find a metal thing in the same box and thought it might be part of the toilet, but I couldn’t see a logical way to fit it. Plus it was only one piece so it couldn’t possibly have had anything to do with the seat, right?
I could still use the toilet and toilet seat, but if I scooted forward on the seat I could accidentally make it fly off of the toilet, which could lead to some embarrassing 911 calls.
Getting “Support”
The next day I started a chat with Toto customer service, and they did some troubleshooting with me. I sent them a photo of the bottom of the toilet seat and the baseplate and answered some questions. They determined that I needed to send the toilet seat in for repair, and it would cost $175 to fix it. That didn’t seem like the worst deal since these toilet seats are usually pretty expensive, and I bought mine refurbished (from Amazon Warehouse) anyway. (Don’t worry, I washed it before I used it and it didn’t seem to have too much poop on it when I got it!)
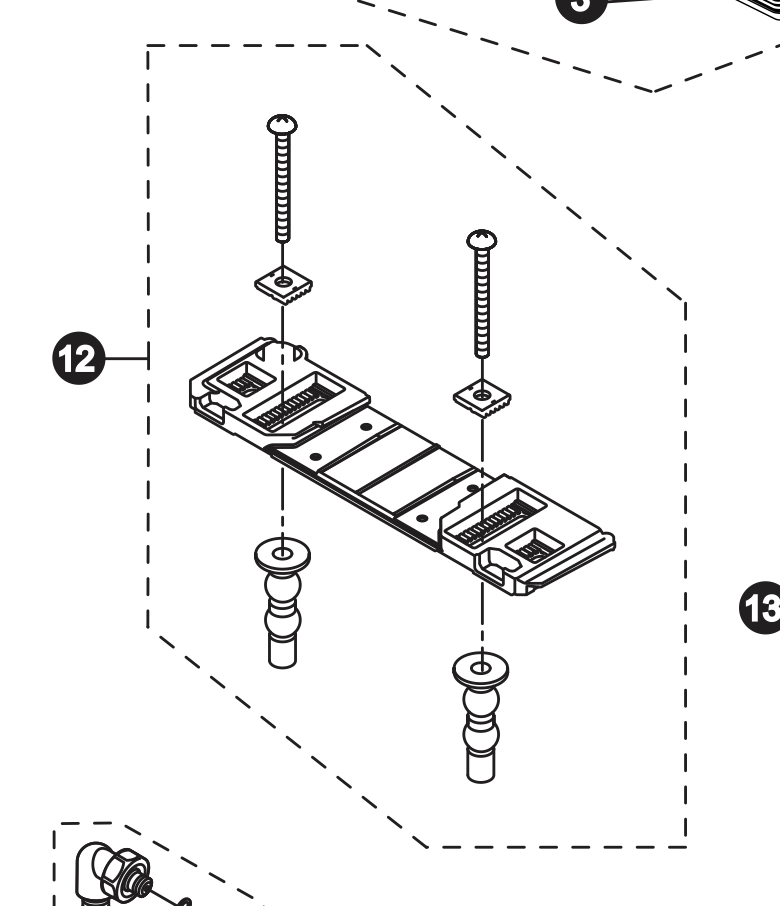
I had a nagging feeling that the baseplate was really the problem though. I did some internet searching and found some pictures of the baseplate with some metal brackets in them, similar to the one that I had discounted before. I also found this forum post where someone basically had the same exact problem, because Toto’s official picture in their manual doesn’t really show those metal brackets, and they don’t even appear in the exploded view of the baseplate. I put the single metal bracket that I had into the baseplate and the toilet seat locked in place! At least half of the seat did.
I went back to customer support and mentioned that I sent them a pic and they misdiagnosed my issue, almost causing me to pay $175 for a repair I didn’t need. They didn’t seem too ashamed of how bad of a job they did, and mentioned that they don’t sell those little metal brackets, and I’d have to buy a whole stinkin’ baseplate just to get a little metal piece. The C200 Washlet I have is no longer in production (I think) so the parts for it are pretty hard to find, or expensive. I didn’t want to spend upwards of $50 just to sit on my toilet, so I decided to try and 3D print the missing part and see if that would work instead. The worst case scenario would be that I could 3D print it and it would just snap off or something.
You Wouldn’t Download a Toilet Seat Replacement Part!
I did try and see if anyone had this exact same problem, and 3D printed the part and made it available online, but unfortunately that’s a pretty niche thing to do. So I used some of my skills in making that Talkboy thing and remade the part from the one piece that I had.

I took a photo of the part with my phone and then I traced it with a pen tool in Pixelmator Pro (apparently they’re part of Apple now). Then I exported that SVG and sized it properly in Tinkercad. I used my digital calipers to measure all of the dimensions and then I just made some more cubes and added them to the SVG shape I made. Then I used Ultimaker Cura to convert that .obj file into gcode so my Ender 3 could print it. This seems like a lot of steps, but I think it probably took me less than an hour of actual work.
It only took like 8 minutes to print. It probably would’ve gone faster if I hadn’t been staring at it the whole time.
The Moment of Truth!
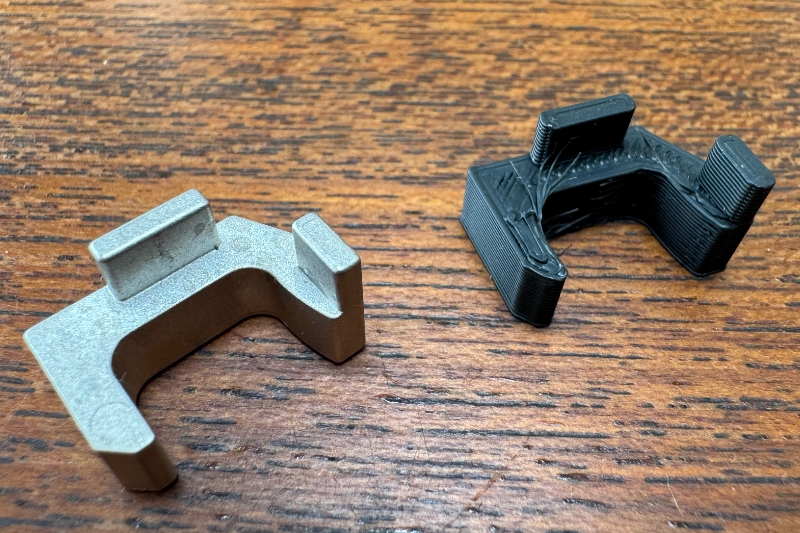
The time had finally come to see if my hard work would pay off, or if it was just a massive waste of time. I took the 3D printed part off of my printer and compared it to the original. “A perfect replica,” I thought in my head. Because I have a huge ego.
I raced to the bathroom, this time for a reason that didn’t involve explosive diarrhea, and tried installing the toilet seat again, with the original part on one side, and the 3D printed part (which miraculously fit) on the other. I slide the toilet seat into the baseplate, and it made a satistying click sound as it locked into place. It worked! I thought to myself, “dang, I should 3D print stuff more often!”
That’s Pretty Much It.
I haven’t written a blog post in a while so I thought why not document this. I also shared the file of the bracket in case anyone else ever loses that part and needs a new one (and also has a 3D printer). You can find it at Tinkercad. (Maybe I’ll share it on some other places, too)
I’m mainly just happy that it all worked and now I get to shoot warm water onto my butt whenever I want. Hopefully someone else finds this blog post useful!